
Creating sublimated sportswear patterns requires precision and attention to detail. Sublimation printing embeds designs directly into polyester fabrics, making it durable and vibrant. Unlike traditional methods, designs must be integrated into digital patterns before printing, ensuring proper alignment and performance. Key steps include:
- Understanding Sublimation: Heat and pressure transform ink into gas, bonding it with polyester fibers. This allows edge-to-edge designs but demands high-resolution files (150 DPI minimum) and precise color profiles (sRGB).
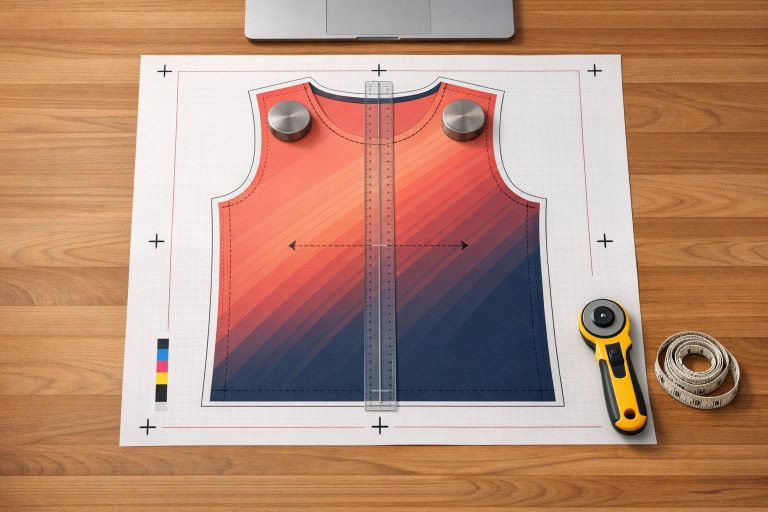
- Accurate Patterns: Patterns must account for fabric stretch and movement, especially in high-motion areas like elbows and underarms, to avoid distortion or seam failure.
- Tools and Software: Use manual tools like French curves and rotary cutters for precision or digital tools like Adobe Illustrator and CorelDRAW for scalable, professional designs.
- Design Process: Include bleed areas to prevent unprinted edges, keep critical elements within safe zones, and simulate designs to catch alignment issues before production.
- Common Challenges: Misjudging fabric stretch, poor seam placement, and grading errors can impact fit and design integrity.
Mastering these basics ensures sportswear that looks great and performs well during intense activity.
Core Principles of Sublimation and Sportswear Patterns
How Sublimation Printing Works
Sublimation printing transforms solid ink into gas using heat and pressure, allowing the dye to bond permanently with polyester fibers. Katrina Resne, Content Writer at Printful, describes the process:
"During this process the sublimation ink embeds into the material rather than sitting on top of it. This way you get a durable print that won’t wash out or crack over time."
This method makes it possible to achieve seamless, edge-to-edge designs with bold colors, intricate textures, and large-scale graphics that cover the entire garment. For professional sportswear, the cut-and-sew approach is commonly used. In this workflow, the fabric is printed while flat, then cut into panels and sewn together. This avoids the white creases that can occur when printing directly on pre-assembled garments. Sublimation only works with 100% polyester or high-polyester blends and delivers the best results on light-colored fabrics. To ensure clarity, print files should have a minimum resolution of 150 DPI and use an sRGB color profile. These technical details are critical for achieving precision in pattern creation.
Why Accurate Patterns Matter in Sublimated Apparel
Accurate patterns are essential to maintaining design integrity, especially in athletic wear where garments must perform under constant movement. Since designs are printed before the fabric is cut, any misalignment or incorrect panel sizing can disrupt the final look. During the heat transfer process, graphics can shift by up to 2 inches, making it vital to include bleed areas that extend beyond the trim line. At the same time, key design elements like team logos and player numbers need to stay within a designated safe print area. As Printful notes:
"It’s not possible to perfectly align patterns or images from front to back."
Precision in patterning also ensures the garment performs as intended. High-motion areas – such as underarms, knees, and elbows – experience frequent flexing, which can stress both the fabric and the sublimated design. Errors in pattern-making can lead to distorted graphics, fabric strain, or even seam failure during active use. The Browzwear Marketing Team emphasizes this point:
"In sportswear, the smallest pattern-making mistake can become a big problem once a garment is worn in real-world motion."
sbb-itb-4d95ad3
Tools and Software for Pattern Making
Manual Pattern Making Tools
When it comes to crafting sublimated sportswear, precision is key, and having the right tools makes all the difference. Essential items include a pattern-making ruler, a set square for perfect right angles, and French curves for smoothly shaping armholes and necklines. These basics cover most of the groundwork for creating accurate patterns.
It’s also smart to keep two separate pairs of scissors – one dedicated to paper and the other to fabric. Why? Paper dulls scissors quickly, which can lead to messy cuts on delicate technical knits. For straight, clean cuts on slippery materials like Lycra or technical mesh, a rotary cutter is a better option.
Other must-haves include tracing wheels and pattern notchers. Tracing wheels help transfer markings between pattern layers, while pattern notchers create small reference points along the edges of panels, making assembly much easier.
While these physical tools give you hands-on control, digital tools offer even greater accuracy and flexibility.
Digital Tools and Software Options
For professional-level sublimation work, Adobe Illustrator is often the go-to choice. It creates vector files (.ai), which are essential for sublimation because they can scale to any size without losing clarity – perfect for designs that span an entire jersey panel. Another excellent option is CorelDRAW, which stands out for its support of customizable ICC color profiles. These profiles ensure that digital colors are translated accurately onto the fabric during printing.
"One of the most essential features to look for is the support for customizable ICC color profiles. This is one feature that you should never overlook, as it is critical to the quality of your prints." – CorelDRAW
Submitting raster files instead of vectors can delay production by up to five business days, so if you choose raster, make sure the images are at least 300 ppi. For those looking for budget-friendly alternatives, Inkscape and Seamly2D are excellent free, open-source options that handle vector-based pattern work effectively.
How To Pattern Print On Activewear (Sportswear Secrets)
How to Create Patterns for Sublimated Sportswear
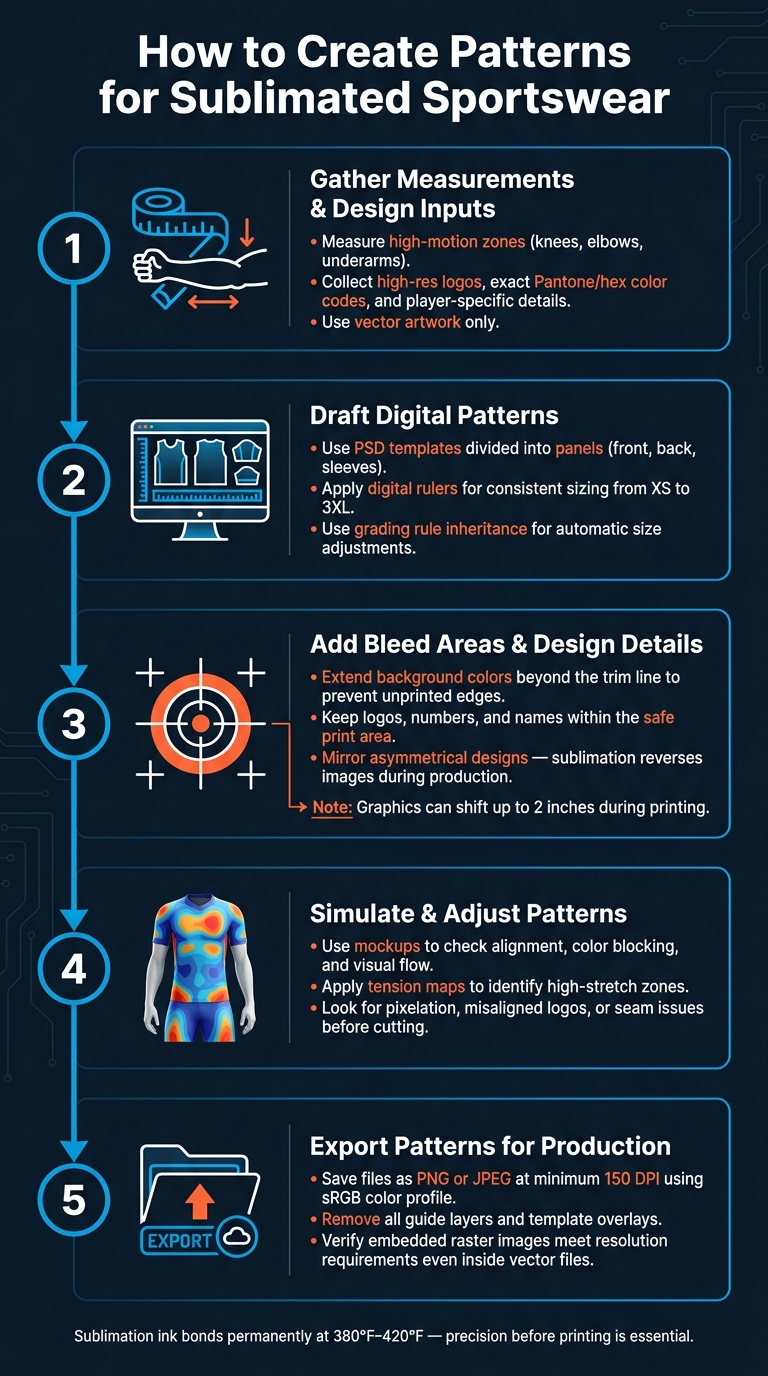
How to Create Patterns for Sublimated Sportswear: 5-Step Process
Step 1: Gather Measurements and Design Inputs
Getting precise measurements is the first step to creating a uniform that fits well. Pay special attention to areas like knees, elbows, and underarms, as these high-motion zones require extra consideration due to fabric stretch during movement.
On the design side, make sure you have everything ready before starting your software. This includes high-resolution logos, exact team color codes (like Pantone or hex values instead of generic terms like "red"), and player-specific details such as names and numbers. Always use vector artwork or licensed files – low-quality images can appear blurry and may even lead to legal complications.
Step 2: Draft Digital Patterns
Using your gathered measurements and assets, start drafting your patterns in design software. Many designers rely on PSD templates that divide the garment into panels – front, back, sleeves, and extras like hoods or pockets. This panel-based method ensures precise placement of design elements and allows for adjustments based on how the fabric stretches and moves.
A helpful trick is to use digital rulers within your software to maintain consistent sizing across all pieces, especially when creating uniforms for a range of sizes from XS to 3XL. If your software offers grading rule inheritance, take advantage of it – this feature automatically adjusts all sizes based on changes to the base size, saving time and reducing errors.
Step 3: Add Bleed Areas and Design Details
Because sublimation uses heat and pressure, slight shifts in the transfer paper can occur. To avoid unprinted edges, always include bleed areas by extending background colors and patterns beyond the final trim line.
At the same time, keep essential elements – like logos, player numbers, and team names – within the safe print area. Placing these too close to the edge risks them being cut off during the cut-and-sew process or disappearing into seams.
"Due to the peculiarities of the sublimation process, graphics may shift up to 2 inches when printed. Because of this, we don’t recommend using designs that require precise placement." – Printful
For text or asymmetrical logos, mirror the design before finalizing it, as sublimation reverses the image during production.
Step 4: Simulate and Adjust Patterns
Use a mockup to preview your design and check for alignment and visual flow. This step helps you catch common issues like pixelation, misaligned logos, or color blocking that doesn’t match up across panels. It’s essential to ensure everything looks cohesive and works with the way the fabric will stretch and move.
For a deeper review, some software offers tension maps that show areas where the fabric will stretch the most. These maps reveal potential distortions in seams or design elements that might not be obvious in a flat preview.
Step 5: Export Patterns for Production
Once you’ve confirmed the design is accurate through simulations, export your patterns for production. Save your files in PNG or JPEG format with a resolution of at least 150 DPI and use an sRGB color profile. Before exporting, make sure to remove any guide layers or template overlays from your file – leaving these in could result in them being accidentally printed on the garment.
If you’re working in vector software like Adobe Illustrator or CorelDRAW, double-check that any linked images meet the resolution requirement. A vector file with a low-resolution embedded image will still produce a blurry print in those areas.
Common Pattern Making Challenges and How to Fix Them
Once designers grasp the basics of pattern creation, they often encounter recurring challenges during production.
Common Problems in Sublimated Patterns
Even experienced pattern makers can run into issues that only surface during production.
One major issue is fabric stretch miscalculation. Materials like Lycra and performance knits stretch differently depending on their weight, weave, and finish. A pattern for custom long sleeve crew neck t-shirts that looks perfect on paper might sag or split when the garment is in motion.
Another common problem is poor seam placement, which can cause chafing, limit movement, or lead to seam failure after repeated wear.
Inaccurate grading also creates issues. Manual scaling might result in a medium size that fits well but leaves an XS too loose or a 3XL too tight. This problem becomes even trickier with intricate designs, as complex graphics increase the risk of misaligned panels and measurement errors that only become evident during assembly.
| Challenge | Impact on Finished Product | Practical Fix |
|---|---|---|
| Fabric Stretch Miscalculation | Garment sags, strains, or splits | Use digital tension maps and fabric scanners |
| Poor Seam Placement | Chafing, restricted movement, seam failure | Simulate motion with digital avatars to identify friction points |
| Inaccurate Grading | Poor fit in extreme sizes (XS/3XL) | Apply grading rule inheritance and side-by-side 3D comparison |
| Complex Design Errors | Misaligned pieces and inconsistent reproduction | Break designs into sections using "Replace Piece" tools |
| Insufficient Ventilation | Overheating and discomfort during activity | Add mesh panels or DryFit zones in high-sweat areas |
The table above highlights key challenges, their impact, and actionable solutions to address them.
Practical Tips to Prevent Errors
To tackle these challenges effectively, consider these strategies:
Leverage tension and pressure maps in tools like VStitcher to visualize stress points on the garment. These maps help identify areas where fabric may overstretch or seams might fail, all before cutting any material.
For complex designs, work on each component individually before assembling the final pattern. CAD software often includes "Replace Piece" tools, which let you swap out panels while retaining internal lines and stitching details. This reduces the likelihood of manual errors. Additionally, using grading rule inheritance ensures consistent sizing adjustments across all sizes, from XS to 3XL.
Lastly, always test your designs with real athletes. Observing them running, lunging, or throwing can reveal fit issues and friction points that software simulations might miss. Real-world feedback is invaluable for refining your patterns.
Design and Production Tips for Wooter Apparel Custom Uniforms
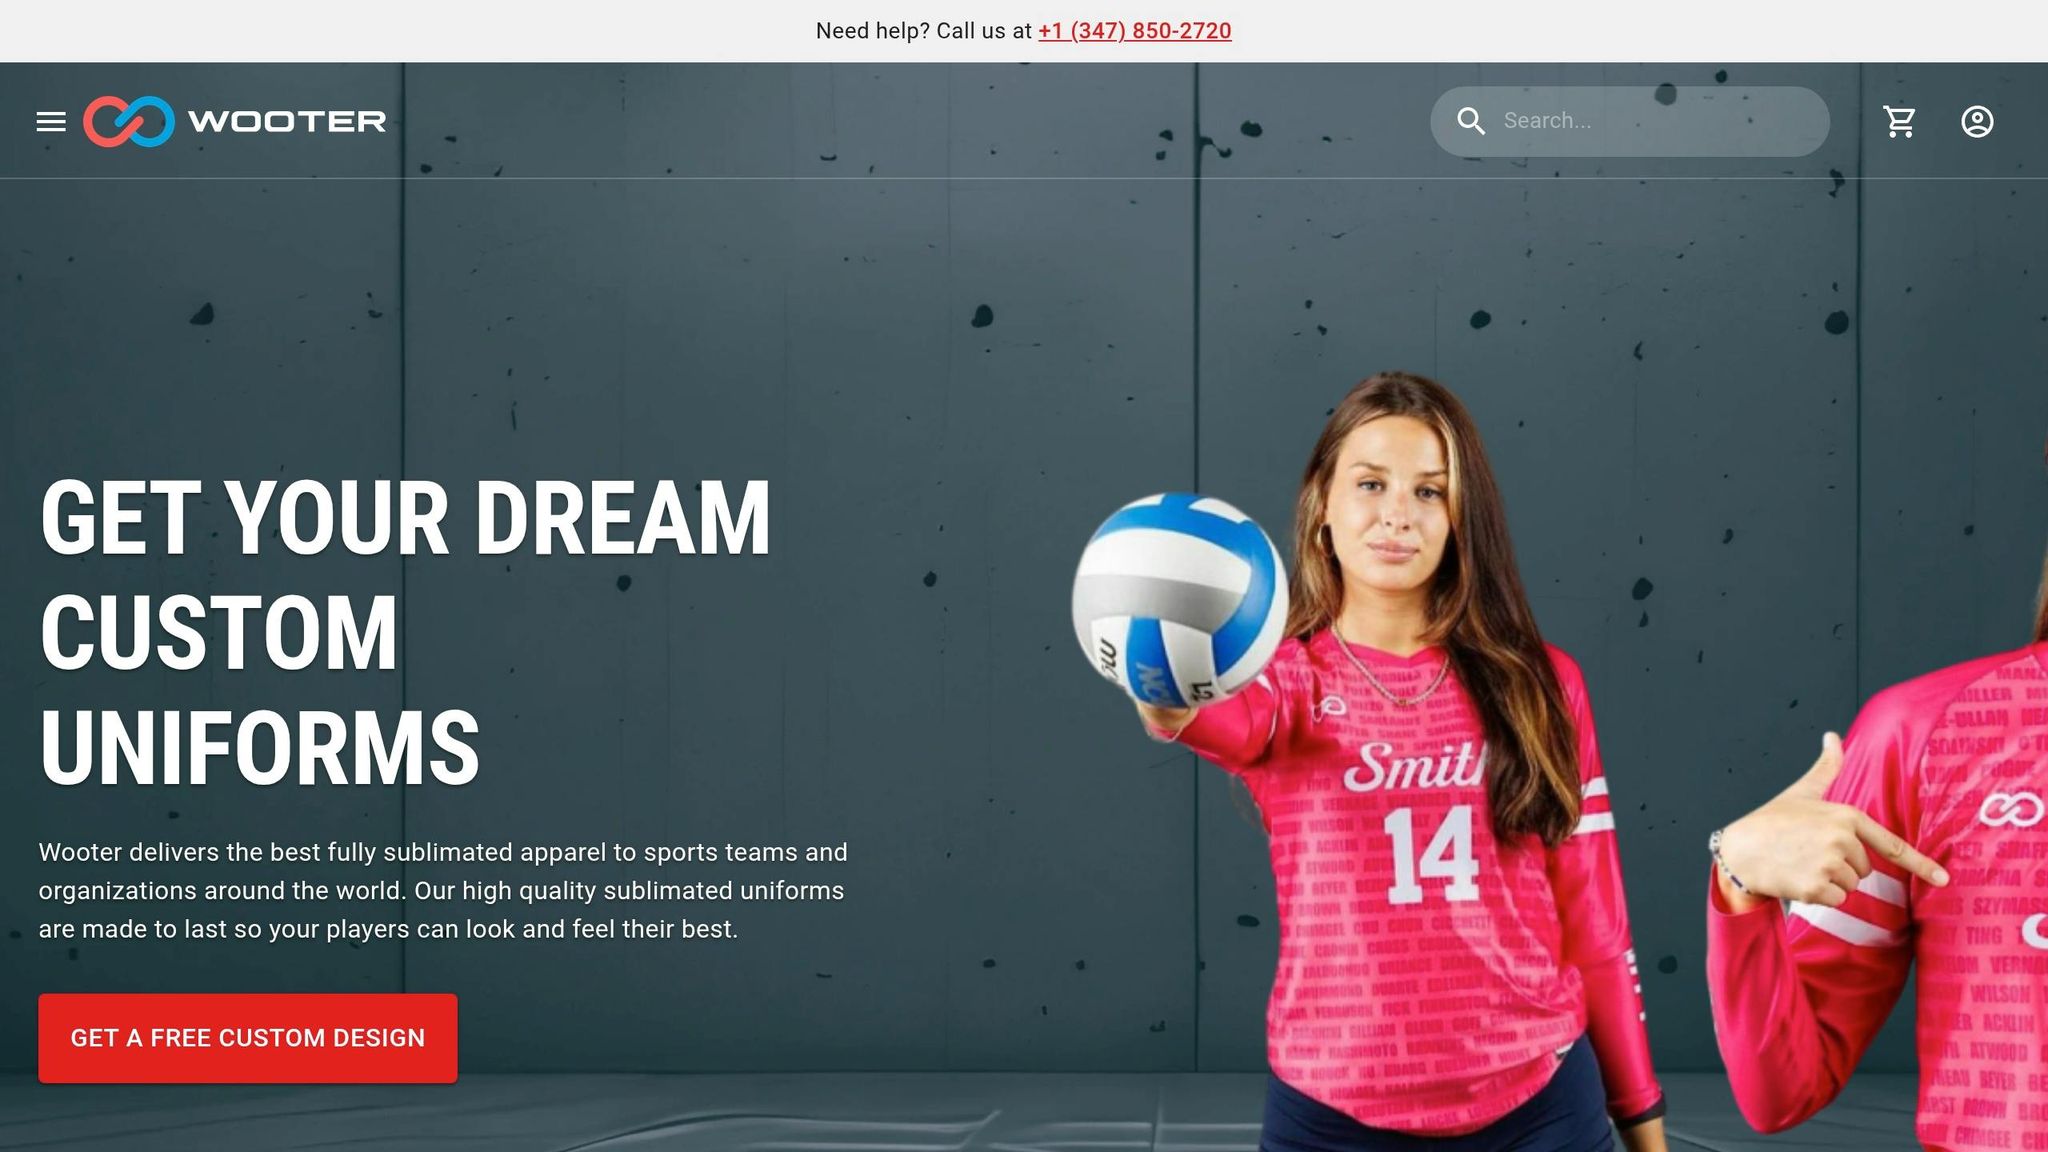
Creating professional-grade uniforms starts with precise design and follows through with a dependable production process. At Wooter Apparel, this journey involves turning custom designs into fully sublimated uniforms that balance style and performance. Their approach ensures that every detail – right from the patterns to the final product – meets the highest standards of quality and functionality.
Using Wooter Apparel’s Free Design Services
Wooter Apparel offers teams two straightforward options for using their Free Design Services:
- Teams can create their uniforms using free, vector-based templates.
- Alternatively, they can collaborate with Wooter’s professional design team to craft a custom concept at no additional cost.
To guarantee sharp, high-quality prints, all artwork must be submitted in vector formats like .AI, .EPS, .PDF, or .CDR.
"It’s important to use an original vector file such as an .ai or .pdf so your print comes out sharp." – Wooter Apparel
Wooter ensures color precision by using the Pantone Matching System with Solid Coated C swatches. Their Color Finder tool makes it easy for teams to pinpoint the exact Pantone code they need. Why does this matter? There are over 200 shades of orange alone in the Pantone system, so accuracy is key to maintaining the integrity of the design.
Production timelines are flexible: standard orders take about 16 business days, while rush orders – available for a 25% surcharge – can be completed in as few as 10 business days.
Customizing Uniforms for Team Identity and Performance
Custom uniforms are more than just apparel – they’re a reflection of a team’s identity. Wooter’s customization process includes integrating design concepts, logos, color schemes, team names, and even custom fonts. For teams without a logo, Wooter can develop one as part of the service.
To ensure the perfect fit, teams can request a 100% refundable sizing kit before placing their full order. This is particularly important because performance fabrics like knits and compression materials may fit differently than standard clothing.
"The jerseys are good quality and the colors are amazing. Fast shipping, excellent customer service." – Calix C., Verified Reviewer
Wooter’s customization options go beyond jerseys. Teams can also personalize shorts, warmup jackets, compression gear, hoodies, bags, and headwear. This allows teams to create a cohesive look across all their gear. With a 4.9-star rating based on 1,366 reviews, Wooter has earned a reputation for quality and customer satisfaction.
Key Takeaways for Successful Pattern Making
When it comes to creating sublimated sportswear, precision is everything. Sublimation ink bonds directly into the fabric at high temperatures (between 380°F and 420°F). This means every design element – logos, numbers, names – must be perfectly aligned in the digital template before printing. Once the ink sets, there’s no going back to fix misaligned graphics.
But precision isn’t just about placement. The materials you choose are just as important. Sublimation works best with 100% polyester or high-polyester blends, but you also need to consider how the fabric behaves. For example, areas like knees and underarms, which experience a lot of movement, require patterns that account for fabric stretch to prevent seams from failing.
Another critical detail? Bleed areas and safe zones. To accommodate potential design shifts (up to 2 inches), include enough bleed area and keep key elements like logos and text within safe zones. And don’t skimp on file quality – use high-resolution files (at least 150 DPI) in an sRGB color profile to ensure your designs are sharp and vibrant.
Sizing is another area where mistakes can be costly. Since sublimation ink is permanent, double-check sizes before production. Refer to size charts early in the process and, if possible, request a sizing kit to avoid errors.
For a smooth transition from design to production, it’s smart to work with professionals who handle the technical stuff – like bleed, color matching, and panel alignment. For instance, Wooter Apparel’s in-house design team can deliver finished sportswear designs in just 1–2 business days, so teams can stay focused on their game.
FAQs
How do I choose the right bleed and safe-zone sizes for my design?
When setting up sublimated sportswear designs, it’s crucial to get the bleed and safe-zone sizes right. Keep all important elements, like text or logos, inside the safe zone to ensure they don’t get trimmed during production. At the same time, extend background colors or patterns into the bleed area to avoid any unwanted blank edges. For best results, rely on templates provided by your printing platform, and make sure your design fully covers the template for a polished, professional look.
What’s the best way to prevent logos and numbers from distorting on stretch fabric?
To keep logos and numbers from warping on stretch fabrics, opt for materials with the right stretch characteristics, such as polyester/spandex blends in ratios like 85/15 or 90/10, and ensure they offer 4-way stretch. It’s important that the fabric maintains balanced tension both vertically and horizontally. Always test fabric samples to check for stretch and print compatibility before starting production. This helps ensure the design holds its shape and quality, even during movement. Choosing the right fabric and conducting thorough testing are critical steps.
What file type and export settings should I use for sublimation printing?
For sublimation printing, stick with PNG or TIFF file formats to preserve image quality and support transparency. Make sure to export your design at a 300 DPI resolution for crisp and vivid results. If you’re working in raster programs like Photoshop, save your files as PNG and confirm the color mode is set to RGB, as sublimation printing relies on RGB color profiles.