
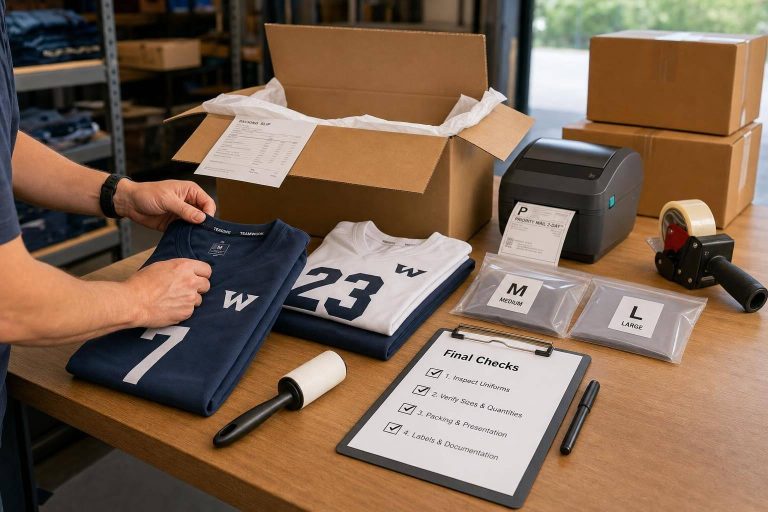
One missed detail can turn a full uniform order into a return, a delay, or a game-day problem. Before I ship team uniforms, I make four checks in order: match the order, inspect the garments, review the packing, and confirm shipping details.
Here’s the whole process in simple terms:
- Check the order first: I compare the packed items to the approved roster, mockup, invoice, and packing list.
- Inspect the uniforms: I look for fabric flaws, stitching problems, print errors, label issues, and size mix-ups.
- Review the packing setup: I make sure each player’s items stay together, carton labels are correct, and pallets are stacked safely.
- Confirm shipping before release: I verify the carrier, delivery address, carton count, tracking, and internal approval records.
A small error rate still adds up on big runs. For example, a 1% issue rate means 10 problem pieces in a 1,000-item order. That’s why I treat the last review as the point where I catch name errors, wrong numbers, and mislabeled cartons before they leave the building.
If I had to boil it down, the goal is simple: ship uniforms that are correct, clean, packed right, and ready to hand out.
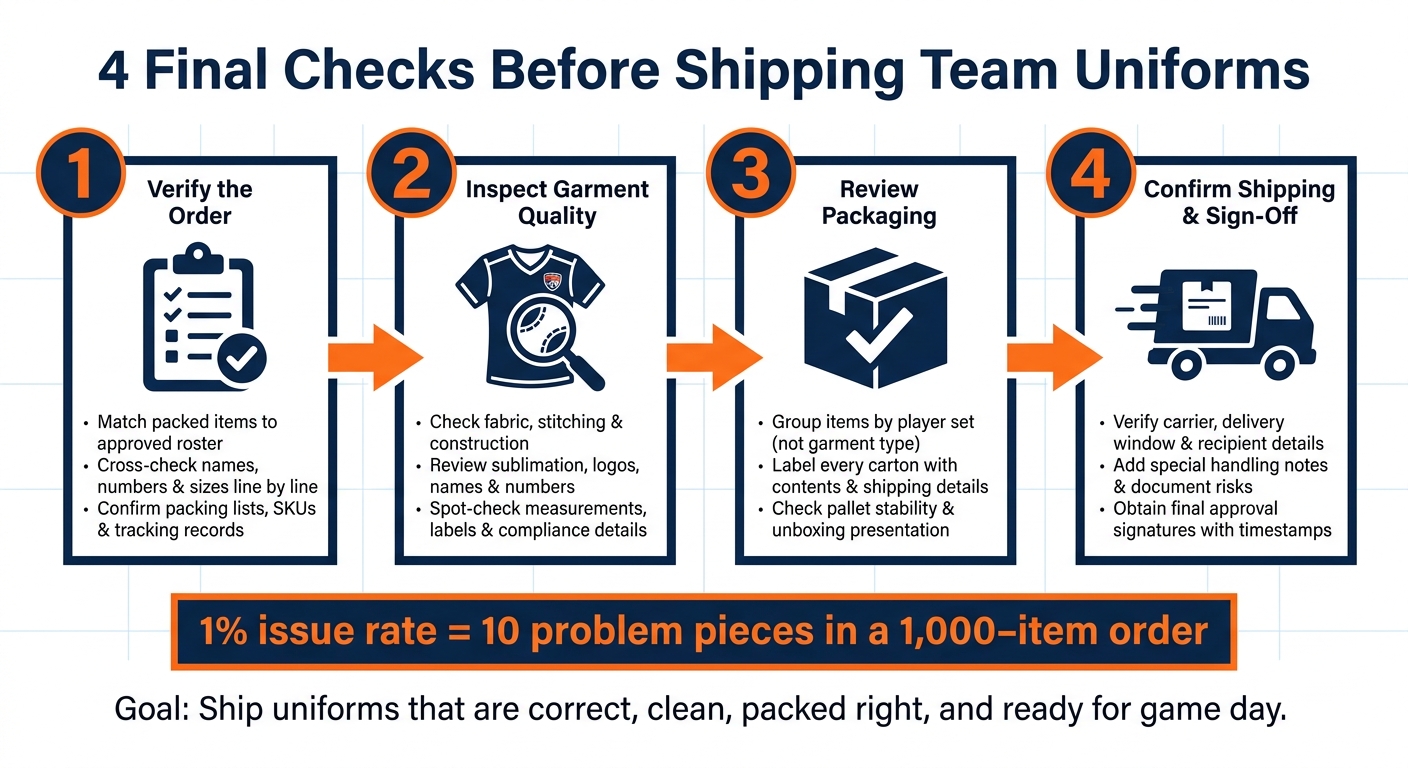
4-Step Pre-Shipment Checklist for Team Uniforms
1. Verify the order, roster, and documents
Before you seal any cartons, compare the packed order against the approved purchase order, roster, and final invoice. Treat the approved order as the source of truth.
Match packed items to the approved order
Open the final approved mockup and check it against the packed items, side by side. Confirm the team name, style, and total quantities by size. Check extras too, like warmup jackets, socks, and other accessories. Those small add-ons are easy to miss during a bulk fulfillment run.
If the order includes special pack-out instructions, flag them before you move ahead.
Cross-check names, numbers, and size breakdowns
Review the roster line by line. Check each player’s name for spelling, capitalization, and spacing. Then verify jersey numbers for font, size, contrast, and placement. Small formatting details matter here, especially "0" versus "00."
"If the roster is not locked, the order is not ready." – Wooter
Give size checks the same level of care. Match each garment label to the roster’s size breakdown. Be clear about youth versus adult sizes, and men’s versus women’s cuts.
Confirm packing lists, SKUs, and tracking records
Cross-check order IDs, batch references, SKUs, carton counts, and tracking records against the packing list and final invoice.
| Document | What to Verify |
|---|---|
| Packing List | Internal order IDs, batch references, barcodes, carton counts |
| Final Invoice | Unit pricing, quantities |
| Carton Labels | Style number, size breakdown, quantity, destination |
| Roster Checklist | Name spelling, number formatting, size distribution |
Have one order owner sign off on this checkpoint. Once the paperwork matches the packed order, move to garment inspection.
sbb-itb-4d95ad3
2. Inspect garment quality and decoration accuracy
Once the order is verified, check the uniforms themselves for build quality, decoration, and label accuracy.
For small orders, inspect every unit. For large batches, sample units after packing is at least 80% complete. Sort any issues as critical, major, or minor, and pull failed units aside for rework.
Check fabric, stitching, and construction
Look for holes, stains, color variation, skipped stitches, open seams, and loose threads. Put stress on shoulders, underarms, inseams, zippers, and buttons to make sure they hold up.
Review sublimation, logos, names, and numbers
Use the approved sample as the benchmark for every decoration check. Compare each garment’s front, back, sleeves, or pant legs to that sample.
| Decoration Element | What to Check | Watch For |
|---|---|---|
| Names | Spelling, capitalization, spacing, font style | Typos, crooked placement, peeling |
| Numbers | Correct roster assignment, size, contrast | Wrong number for size, off-center, unreadable font |
| Logos | Sharp edges, correct file version, color match | Fuzzy edges, color bleeding, missing elements |
| Placement | Centered on chest/back, sleeve alignment | Misaligned patterns across seams, uneven height |
For sublimated uniforms, check panel alignment so the artwork lines up across seams. It sounds minor, but a design that breaks awkwardly at the seam sticks out fast. Review color accuracy in both natural daylight and artificial light too. That’s one of the best ways to catch slight shade differences between units.
"If the numbers are not readable from the stands, the design fails." – Wooter
Spot-check measurements, labels, and compliance details
Measure key dimensions against the approved size chart. Then verify the required labels: country of origin, fiber content, care instructions, and RN/WPL number. If labels are missing or wrong, the garment fails inspection.
After defects are cleared, move to packaging review.
3. Review packaging, carton setup, and presentation
Packaging has two jobs here: protect custom football uniforms in transit and make handout simple when the order arrives. Once the garments clear inspection, shift to packing and carton review.
Prepare each garment and group team sets correctly
Before anything goes into a box, fold every piece the same way. That small step makes the carton look neat the moment it’s opened.
Pack by player set, not by garment type. In plain terms, keep each player’s jersey, shorts, and any accessories together. That makes distribution much faster and cuts down on mix-ups.
Label cartons with contents and shipping details
Every carton needs a clear label before you seal it. At minimum, include:
- Carton number, such as Carton 1 of 4
- Team name
- Short item summary
Weigh each carton in pounds and measure its dimensions in inches to make sure it stays within the carrier’s limits. Then match every carton against the approved pack list before sealing.
Check pallet stability and unboxing experience
For larger orders that ship on pallets, stack cartons securely and wrap them for transit. Labels should stay easy to read so the shipment can be identified fast.
Inside each carton, keep folding consistent and place branded inserts neatly so the shipment opens in an organized, professional way.
If the pallet and carton checks pass, move to shipping confirmation and final sign-off.
4. Complete shipping confirmation and internal sign-off
Once the cartons and pallets clear review, the next step is simple: confirm every delivery detail and get sign-off from the people who need to approve the release.
Confirm carrier service, delivery window, and shipping records
First, check the carrier, service level, and tracking records against the original purchase order and the required delivery window. Make sure the shipment is lined up with what was ordered and when it needs to arrive.
Then verify the recipient details. That includes the recipient name, whether it’s a coach, athletic department, or team manager, plus the full street address and a direct delivery phone number. Small errors here can turn into missed deliveries fast.
Match the total carton count to the packing list. After that, pull the commercial invoice, packing list, shipping marks, and tracking info into one shipment file for post-delivery support.
Add special handling notes and document risks
For event-driven orders with hard delivery deadlines, transit risk needs extra attention. Review risks like moisture exposure and crush damage, then apply "Keep Dry" or "Do Not Stack" labels where needed. Add those same notes to your shipping records and the Bill of Lading. Do this before final release.
Take photos of the pallet, labels, and final weight before departure. If there’s a transit dispute later, that record gives you something concrete to point to.
"A good factory release checklist does not make production perfect. It makes risk visible before the goods move out of the buyer’s control." – Fabrikn Team
Use a final approval form before release
Before releasing the shipment to the carrier, get sign-off from production, QC, and shipping. Each approver should record their name, signature, and timestamp.
It also helps to assign one order owner to control the final document set. That cuts down on version mix-ups when several people are touching the shipment file.
Conclusion: The final checklist that protects quality and delivery
Use these four checks as the final release gate before shipping. They draw a clear line between something made in production and something ready for pickup: verify the order, inspect quality, confirm packaging, and sign off.
Sizing mistakes are a common reason for returns. A missed name, the wrong number, or a mislabeled carton can slow everything down and lead to delays that didn’t need to happen in the first place. That’s the kind of issue these checks are meant to catch before delivery, not after.
For Wooter Apparel orders, this same process helps protect custom designs from production through delivery. The goal is simple: uniforms show up complete, accurate, and ready for game day. Once all four checks are done, the order is ready to ship.
FAQs
What is the most common pre-shipment mistake?
The most common pre-shipment mistakes are sizing inconsistencies and design errors, like misspelled names or wrong player numbers.
Trouble also shows up when the final inspection gets skipped. That’s when issues like poor logo placement, loose stitching, or color differences between batches can slip through.
Before packaging, check each garment against the approved design proofs and roster sheets.
Should every uniform be inspected before shipping?
Yes. Every uniform should go through a full inspection before it ships.
At Wooter Apparel, each piece passes through a required quality assurance check to confirm durability, fit, and design accuracy.
This final review looks at seam strength, color consistency, key measurements, and functional parts. That way, only approved items are labeled, packaged, and shipped.
What records should be kept after shipment?
After your shipment arrives, keep a record of any issues you spot during inspection. Take photos of problems like stitching errors, logo placement issues, number or letter alignment mistakes, or fabric quality concerns.
You should also save your original order number from the email for customer support. Wooter Apparel can’t process redos or fix issues reported more than 30 days after delivery.