
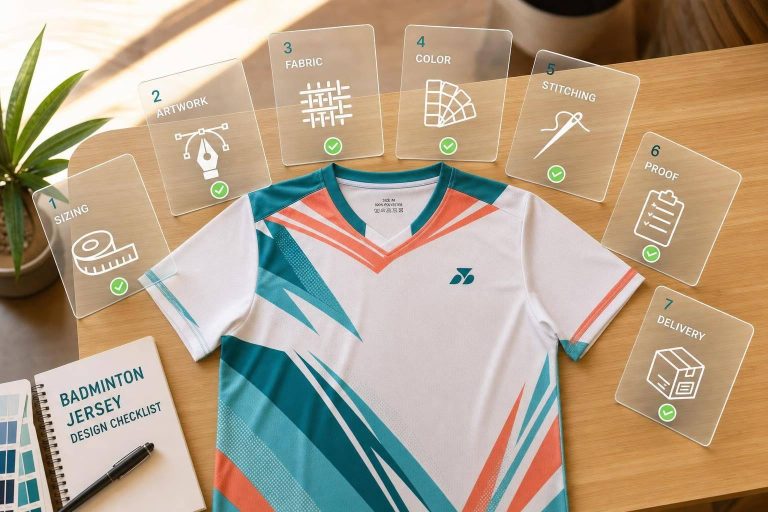
Most bad jersey orders fail for simple reasons: wrong sizes, low-contrast numbers, missed proof errors, or not leaving enough time for production and shipping.
If I were placing this order today, I’d check 7 things first: roster, rules, budget, fabric, artwork files, proof details, and delivery dates. For most teams, the cost lands around $55–$110 per player, production often takes 3–6 weeks, and U.S. shipping can add another 3–7 business days.
Before I send anything to a vendor, I’d make sure I have:
- Player info: full name, number, size, height, chest, and waist
- Team rules: color, logo, text, and number limits
- Fabric choice: usually 100% polyester or a high-poly blend
- Artwork setup: vector logos, CMYK files, 300 DPI, bleed, and safe zones
- Readability check: names and numbers that stand out under indoor lights
- Approval check: spelling, placement, quantities, and player-by-player sizes
- After-order plan: washing notes, reorder files, and defect policy
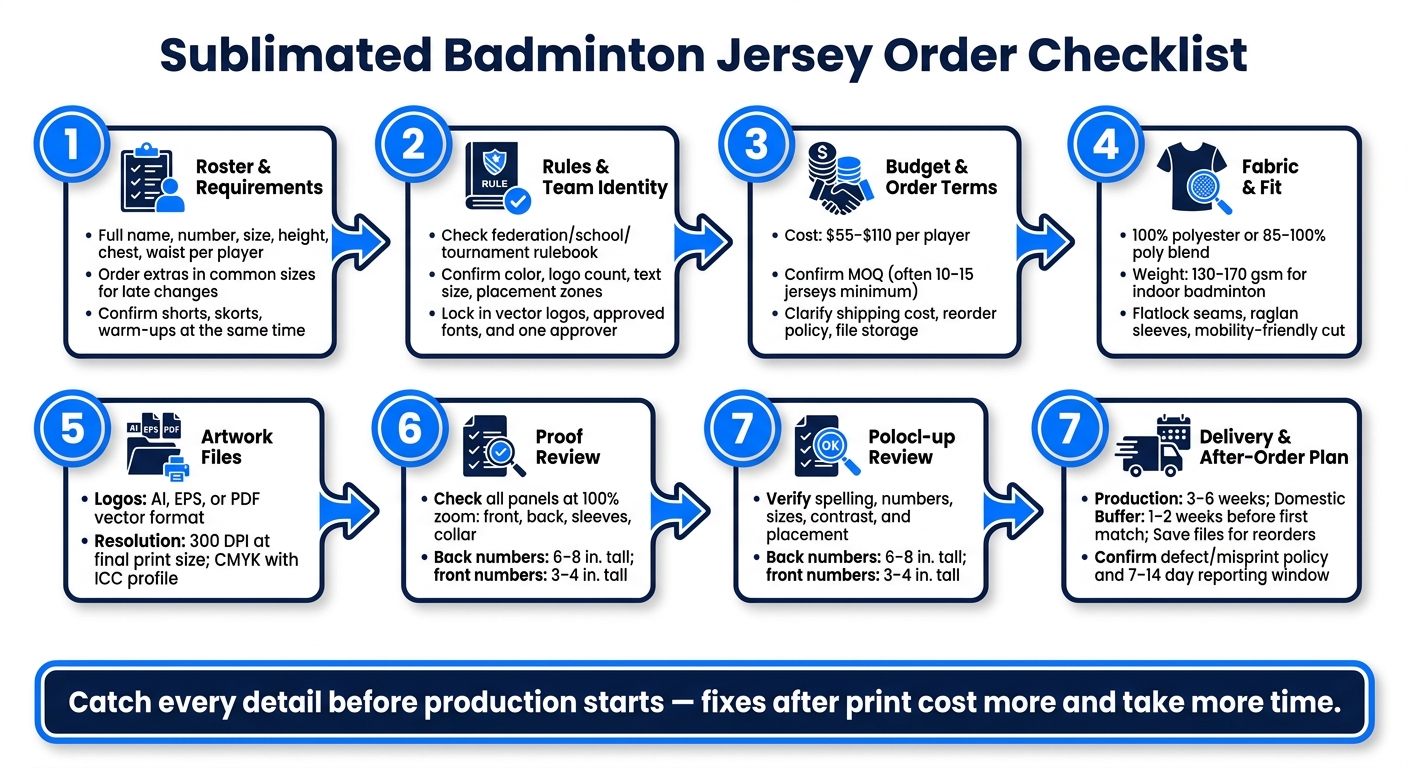
Sublimated Badminton Jersey Order Checklist: 7 Steps to a Perfect Uniform
Quick Comparison
| Checkpoint | What I’d confirm | Common mistake |
|---|---|---|
| Team setup | Roster, deadlines, extras, rules | Starting design before roster is final |
| Cost and order terms | $55–$110 per player, MOQ, shipping, reorder policy | Missing added shipping or reorder limits |
| Fabric and fit | Polyester, 130–170 gsm, movement-friendly cut | Picking fabric by look only |
| Artwork files | AI/EPS/PDF logos, 300 DPI, CMYK | Sending RGB files or low-res logos |
| Print layout | Bleed, safe zones, seam-safe placement | Putting text too close to trim or seams |
| On-court reading | Strong contrast, bold numbers, clean fonts | Dark text on dark patterns |
| Final approval | Proof, delivery window, replacement policy | Approving too fast and missing errors |
The main goal is simple: catch every detail before production starts, because fixes after print cost more and take more time.
sbb-itb-4d95ad3
1. Confirm Team Requirements Before Designing
Locking down the basics before any artwork starts saves time, money, and headaches later.
Define Use, Roster, and Deadlines
Start with the jersey’s job. Is it for match play, practice, school competition, or a club tournament run? Once that’s clear, you can line up the fabric, fit, and numbering with what the team needs.
Next, gather each player’s full name, jersey number, size, height, and chest measurement in inches. Then match those details to the supplier’s size chart. It also helps to order a few extra jerseys in common sizes for late roster changes or swaps.
If the order also includes shorts, skorts, long-sleeved warm-ups, or accessories, set those colors and logo placements at the same time. Doing it all in one pass keeps the set looking consistent.
Then build the schedule backward from the first game date:
- Finalize roster and requirements
- Complete design concepts
- Approve print proofs
- Production window (3–5 weeks)
- U.S. shipping (1–2 weeks)
Sublimated jerseys often go through more than one proof round, so leave room for that in the timeline.
Once the order details are set, check event rules next. Those rules can affect text size, logo count, and placement.
Check Badminton Rules and Team Identity
Before design work begins, check the rulebook for your federation, school, or tournament. Some events limit text size, logo count, and placement zones, so it’s smart to verify those rules before anyone signs off on the artwork.
After that, lock in the team colors, vector logos, and approved fonts. Pick one person to approve colors, logos, and fonts so late changes don’t throw the whole process off.
With the rules settled, fix the visual identity early so the artwork stays steady through proofing.
Confirm Budget and Minimum Order Details
Plan on sublimated uniforms costing about $55–$110 per player, based on garment type and customization.
At this stage, confirm:
- Minimum order quantity
- Shipping cost
- Reorder policy
- Whether artwork stays on file
Some vendors require a minimum of 10–15 jerseys per order. Others offer no MOQ and a 10–15 day production window. If you already expect to add players next season, rolling those units into the first order can lower the per-piece cost now.
Then move to fabric and fit, since budget and order size affect material choices.
2. Check Fabric, Fit, and On-Court Comfort
Choose Sublimation-Ready Fabric
Your fabric choice needs to do three jobs at once: move with the player, let heat escape, and hold a clean sublimation print.
For badminton jerseys, stick with 100% polyester or an 85–100% polyester blend. Sublimation bonds best to polyester at about 380–400°F, and fabric weights around 130–170 gsm are a good fit for indoor badminton.
There’s some simple logic here. 130–145 gsm fabrics feel lighter and work well in hot or poorly ventilated gyms. 150–170 gsm options give you a better mix of durability, opacity, and comfort for typical air-conditioned U.S. gyms.
If airflow is a concern, mesh side or back panels can help. That gives players more ventilation without hurting print quality on the main body panels.
Verify Mobility and Sizing
Badminton puts a lot on a jersey. Players need full overhead reach, fast side-to-side movement, and room for deep lunges.
That’s why details like raglan sleeves or slightly extended sleeves matter. They can reduce pull and restriction during overhead shots. A slightly longer body length also helps the jersey stay put when a player lunges or stretches low.
For sizing, don’t guess. Measure each player’s chest and waist, then match those numbers to the right men’s, women’s, or youth size chart.
Check Seams, Collar, and Edge Finish
Small construction details can make a big difference over a long match.
Look for flatlock seams, low-friction necklines, and sleeve openings that won’t rub or flare during play. It also helps to avoid seams in the underarm and inner arm area, since racket swings create the most repeated contact there.
A quick hands-on check goes a long way. Run your hand along the neck and shoulder seams before you approve the order. If anything feels rough at rest, it’ll probably feel worse in play.
Fabric Comparison Table
| Fabric Type | Breathability | Stretch | Durability | Sublimation Quality | Best Use |
|---|---|---|---|---|---|
| Polyester Mesh | High | Low | Moderate | Good (on solid panels) | Side/back vents, training tops |
| Polyester Interlock | Moderate | Low | High | Excellent | Main match jersey body |
| Polyester-Spandex Blend | Moderate | High | Moderate | Good | Shoulder yokes, side panels |
Once fabric and fit are set, the next step is checking artwork layout and print-safe placement.
3. Build Artwork That Prints Cleanly on Sublimated Panels
Prepare Logos, Colors, and Player Data
Once fabric and fit are approved, build the artwork from the final template. Use print-ready files from the start. For logos, send AI, EPS, or PDF files so they scale cleanly without pixelation. For photos and textures, keep them at 300 DPI at final size. Build the file in CMYK and use the printer’s ICC profile.
For color, use both Pantone and CMYK values for each brand color. What looks right on a screen can shift once it’s printed on polyester. That small step can save a lot of back-and-forth later.
For player info, make a roster sheet with each player’s number, full name, and final print version. Have one person approve the roster before production starts. If mistakes show up after production begins, reprints can get expensive fast.
Set Up Templates, Bleed, and Safe Zones
Design only on the manufacturer’s jersey template. That template should show panel pieces, seam lines, cut lines, and safe zones. Stay inside it. If you don’t, text can get clipped and graphics can land right on a seam.
Set the file to 300 DPI at full jersey size, in inches. Extend all backgrounds and color blocks into the bleed area, usually 0.125–0.25 in. past the cut line on all sides. This helps prevent white edges after cutting and sewing.
Keep every key element – names, numbers, and logos – at least 0.25 in. inside the trim line. Give yourself even more room near necklines, armholes, and raglan seams, where sewing tolerance can shift placement a bit.
Once placement is locked, move on to names, numbers, and proof approval.
Check Color Contrast and Indoor Visibility
Badminton is played under bright indoor lights, and those lights can wash out low-contrast designs fast. Before you approve a proof, place names and numbers on the final background, including any gradients or patterns, and check how they read from court distance.
A few simple rules help:
- Use white on dark backgrounds and black on light backgrounds.
- Add a stroke around numbers if the background has a busy pattern.
- Avoid dark-on-dark combinations, which can be hard to read during play.
Artwork Errors Comparison Table
| Artwork Error | What It Looks Like on the Finished Jersey |
|---|---|
| Low-res logo | Fuzzy, pixelated edges on the chest or back graphic |
| No bleed | Thin white border along hems or side seams |
| Element on a seam | Logo or number appears split or misaligned after sewing |
| Dark text on dark gradient background | Names and numbers unreadable in match conditions |
| Wrong color mode | Team colors shift noticeably from what was approved on screen |
| Roster not proofed | Wrong name spelling or duplicate numbers requiring costly reprints |
4. Review Readability, Production Approval, and Order Details
Check Names, Numbers, Contrast, and Placement
Once the layout is set, the job shifts from does it look good? to will it read well on the court and print the way you expect? That last check matters more than a lot of teams think.
Go through these placement rules and size checks before you approve anything:
- Back numbers must be at least 6–8 inches tall, and front numbers at least 3–4 inches tall
- Stroke thickness must be at least 0.25 inches to stay crisp after sublimation and washing
- Use bold athletic fonts that stay easy to read from court distance
- Run a grayscale check to make sure contrast still holds up
- Keep player names in a clean upper-back zone and numbers in a solid or near-solid mid-back or front-chest area
- Place sponsor logos above the number, on the opposite chest, or on the sleeves – never behind names or numbers
This is also the point where small design choices can save you from a big headache later. A number may look fine on a laptop screen, then turn muddy once it’s printed on fabric. The grayscale check is a quick gut test: if the design falls apart without color, the contrast probably isn’t strong enough.
Approve Print Proofs and Production Specs
Review the digital proof with care before production starts. Check every panel – front, back, sleeves, collar, and side inserts – at 100% zoom so you can spot thin lines, small logos, or fine textures that may vanish at actual size. Pay close attention to any shifts the printer flags for polyester sublimation, especially with deep blacks, strong reds, or fluorescent tones.
Then run one last spec check. Verify spelling, capitalization, spacing, roster numbers, font, size, contrast, placement, logo clarity, quantity, and player-specific size assignments. Confirm the final roster, garment pieces, collar and sleeve style, and any special add-ons like flag patches or event logos.
Production begins only after the final order, payment, and signed proof are received. After approval, lock in the delivery terms before payment goes through.
Confirm Shipping, Delivery Window, and Replacement Policy
After proof approval, get the delivery terms in writing. Production usually takes 3–6 weeks from final approval, and domestic shipping often adds 3–7 business days. Leave yourself a buffer of at least 1–2 weeks between the promised delivery date and the first match. That extra time can be a lifesaver if a box gets delayed or a replacement is needed.
Before you send final payment, confirm:
- The carrier, tracking, and insurance
- Whether shipping is included in the price or charged separately
- The vendor’s written policy for defects, misprints, and sizing errors
- The reporting window, often 7–14 days after delivery
- What proof is required, and whether replacements or credits are issued at no cost for production-side mistakes
When the order arrives, count every item and check each size, name, and number right away. If something’s off, photograph it on the spot. That kind of paper trail can make the difference between a smooth fix and a long back-and-forth.
5. Check Care, Reorders, and Long-Term Use
Review Washing and Drying Instructions
Once the jerseys arrive, good care matters. Heat is the biggest risk after printing.
Wash jerseys in cold water on a gentle cycle with a mild liquid detergent. Skip bleach, optical brighteners, fabric softeners, and dryer sheets.
Hang dry them indoors and keep them out of direct sunlight. If you need to use a dryer, use low heat only. Store jerseys clean, fully dry, and on hangers in a cool, dry place.
A few simple habits help over the course of a season. Turn jerseys inside out before washing. Keep them away from Velcro, zippers, and other rough items that can snag the fabric, a common issue with custom tennis shirts and other lightweight performance gear. And never stuff damp jerseys into sealed bags or bins. That’s how mildew and odor start.
With proper care, prints usually last 1–3 years. Hot washes and high-heat drying can shorten that lifespan to just months.
Save Records for Reorders
When the season ends, save the approved files so future reorders match the first batch. Keep the final mockup, vector files, Pantone codes, font names, and order ID in a shared team folder.
It also helps to store everything in a shared cloud folder linked to a team or school account, not a personal account. That way, the files don’t disappear when staff changes. Alongside that folder, keep a roster spreadsheet with each player’s full name, jersey name spelling, number, size, and cut. Add fit notes too, like "runs small" or "size up one size."
When reorder time comes around, that file can save a lot of back-and-forth and make the request simple.
Conclusion: Final Checklist Before You Place the Order
You’ve already gone through the big stuff: requirements, fabric, artwork, proofs, and care. At this stage, the goal is simple. Catch any mismatch before production locks the order.
Use this last review before you hit submit:
- Roster accuracy – Check every player’s name spelling and number one more time. Once they’re printed, they’re permanent.
- Size counts – Match your roster to the manufacturer’s size chart, not a generic one. Sublimated garments can fit differently from standard retail items.
- Minimum order – Make sure your order meets the minimum quantity.
- Color mode – Check that your artwork files are in CMYK, not RGB.
- Proof review – Make sure every detail is approved before production starts.
- Delivery window – Confirm the quoted production and shipping timeline fits your first match or event.
- Reorder file storage – Check that the manufacturer keeps your design on file for reorders.
A fast review now can save you from an expensive fix later.
FAQs
How do I avoid sizing mistakes?
Don’t use the same layout for every size. Youth and adult jerseys need different scaling for logos, names, and numbers, so each one looks right on the garment.
Check the design area for every jersey size, and review the fit across the full size range in mockups or prototypes. That extra pass can save you from a layout that looks fine on a medium but feels off on a youth small or adult 3XL.
Also, confirm the design canvas dimensions for each size. When you resize, don’t stretch elements to make them fit. Do a final review at 100% scale so you can see the design as it will print.
Sample prints on fabric are also worth it. They can help you confirm placement, check fit, and account for up to about 5% shrinkage before full production.
What file types should I send?
For the best results, send artwork in original vector formats such as .ai, .pdf, or CorelDRAW files. These file types stay sharp when scaled, which helps your design print clean at any size.
If you need to use raster images, make sure they are at least 300 DPI at the final print size. Save them as a high-quality TIFF or high-resolution PNG. Use PNG when you need transparency, and convert all fonts to outlines so there are no font substitution errors.
How early should I place the order?
Plan ahead. Wooter Apparel’s standard production time for custom sublimated jerseys is 16 business days. If you’re on a tighter schedule, there’s also a 10-business-day rush option for an extra 25%.
It’s smart to leave room for fabric quality testing and final design approval before full production starts.