
Sublimation printing ensures team uniforms remain durable and visually appealing under intense use. But even the best prints can fail without proper testing. Here’s what you need to know:
- Why test? To catch issues like fading, color shifts, and design blurring before production.
- How it works: Sublimation embeds ink into polyester fabric, creating designs that resist peeling, cracking, and fading.
- What to test for: Color accuracy, wash durability, stretch resistance, and exposure to sunlight and moisture.
- Tools needed: Heat press, polyester fabric samples, washing machine, UV light, and stretching frames.
- Key steps: Inspect designs, wash samples, stretch fabrics, and test for sun and moisture resistance.
Testing ensures uniforms perform well on the field and maintain their appearance over time. Skipping this step can lead to costly reorders or subpar results. Follow a systematic approach to ensure high-quality prints for your team.
10 Common Sublimation Printing Problems and How to Solve Them
What Is Sublimation Printing and How It Works for Team Uniforms
Sublimation printing is a process that uses heat to turn solid ink into gas, embedding it directly into polyester fibers for a long-lasting design. When heated to about 400°F, the ink transforms into gas and bonds at a molecular level with polyester fabric.
Here’s how it works: Start by printing your design on sublimation paper. Then, press the paper face-down onto polyester fabric at around 400°F for 45–60 seconds. The heat opens up the synthetic fibers, allowing the gaseous ink to seep in and become part of the material as it cools. This technique only works on polyester or polyester-coated surfaces because natural fibers like cotton don’t have the necessary molecular structure for bonding.
Why Sublimation Printing Works Well for Team Uniforms
Team uniforms endure tough conditions – intense physical activity, frequent washing, and exposure to various weather elements. Sublimation printing is particularly suited for sportswear because of its durability and performance benefits.
One of the biggest advantages is the permanent bonding of the ink to the fabric. This ensures that designs won’t crack, peel, or flake, even after repeated stretching and washing. Since the ink becomes part of the material, the surface remains smooth and lightweight, reducing discomfort and allowing unrestricted movement.
Another key benefit is vivid color reproduction. Sublimation delivers bright, saturated colors that stay vibrant over time. It’s excellent for intricate designs, gradients, and even photographic images, making it perfect for team logos, player names, and numbers.
The process also maintains the fabric’s breathability. Because no extra layer is added, air can flow naturally through the material, helping with moisture control and keeping athletes comfortable during games or practice sessions.
Finally, sublimation is ideal for edge-to-edge designs. Full-coverage printing is possible without extra costs for additional colors or complex graphics, making it a cost-effective option for detailed team uniforms.
Problems That Can Occur with Sublimation Prints
While sublimation printing offers many benefits, certain issues can arise if the process isn’t carefully managed, potentially affecting the quality and durability of the final product.
Image ghosting happens when the transfer paper shifts during pressing, often when opening or closing the heat press. This results in a faint, shadow-like duplicate of the design, which can make the uniform look unprofessional.
Dull or faded transfers occur when prints lack vibrancy or appear too light. This can happen due to printing on the wrong side of the sublimation paper, incorrect color settings, low-quality materials, insufficient heat, or using fabric with a low polyester content.
Ink bleeding or spreading leads to smudged designs or colors extending beyond their intended areas. This can also happen when previously transferred images bleed onto new fabric during subsequent pressings.
Color shifting, particularly with black prints, can cause colors to appear brown, red, or greenish instead of true black. This issue is often caused by overheating, incorrect color profiles, or poor ink absorption by the fabric.
Uneven or patchy transfers result in inconsistent designs, where some areas appear fully transferred while others look faded or incomplete. This can stem from uneven heat distribution, inconsistent pressure, or moisture trapped in the fabric.
Press marks or scorching leave visible imprints or burnt areas around the design. These marks are typically caused by excessive heat, too much pressure, or using heat-sensitive fabrics.
Understanding these potential challenges is key to achieving high-quality results. The next section will cover the tools and setup you need for effective sublimation print testing.
How to Set Up for Sublimation Print Testing
Setting up a proper testing environment is essential for ensuring your sublimation prints meet both performance and visual standards. A well-prepared setup allows you to identify any potential issues before moving into full production.
Tools and Materials You Need
To replicate game conditions, gather the right tools and materials. Start with a heat press that can maintain consistent temperatures between 375°F and 400°F, along with reliable pressure control. Use a digital thermometer gun to double-check the heat press temperature for accuracy.
For fabric testing, collect sample pieces of the exact polyester or polyester-blend material intended for production. You’ll also need sublimation paper, sublimation inks, and heat-resistant tape to keep the paper securely in place during pressing.
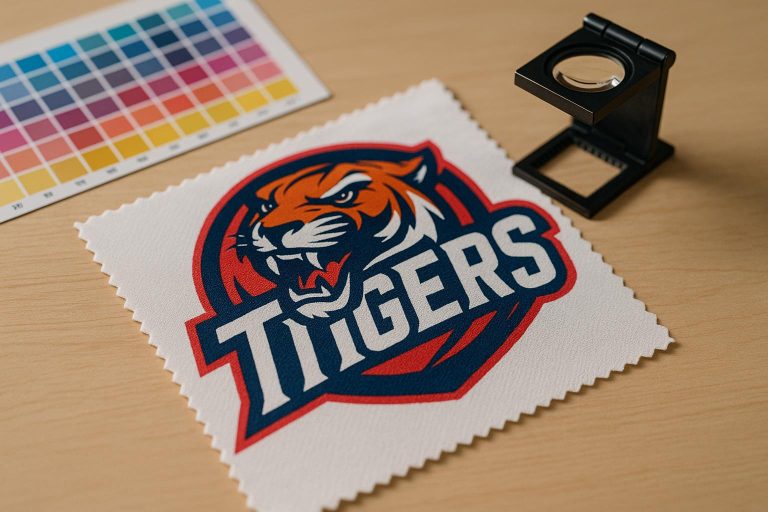
To verify colors, use a Pantone guide or a digital color chart. A magnifying glass or jeweler’s loupe can help you inspect fine print details that might be overlooked otherwise. For durability tests, have a washing machine and dryer on hand, along with both standard and sports-specific detergents. A stretching frame or clamps can also be useful for checking how the design holds up when the fabric is stretched.
For environmental testing, use UV lamps or natural sunlight to evaluate fade resistance, and a spray bottle for assessing moisture resistance. Keep a logbook or digital spreadsheet to record your test settings and results, which will help you refine your process over time.
Finally, confirm that the fabric samples you’re using for testing match the materials planned for production.
Selecting the Right Test Fabric
Your test fabric must be identical to the material used in production. Polyester blends and fabric weights can significantly impact sublimation results, so consistency is key. Pure polyester typically delivers brighter colors, while blends may produce more muted tones. For instance, if your uniforms use a polyester-spandex blend for added stretch, your test samples should have the same composition.
Fabric weight also plays a role. A lightweight 4-oz polyester will behave differently under heat and pressure compared to a heavier 6-oz athletic mesh. This difference may require adjustments in pressing time or temperature. Additionally, finishes like moisture-wicking or anti-microbial coatings can influence how well the sublimation ink adheres, affecting both color vibrancy and durability.
Request fabric samples from your supplier before starting any tests. Cut the samples into uniform sizes, such as 6" x 8", and label them with their specifications and test dates for accurate record-keeping.
Setting Temperature, Pressure, and Time
Once your materials are ready, fine-tuning your heat press settings is critical. Even small variations in temperature, pressure, or time can impact the quality and durability of your prints.
Start by calibrating your heat press. Most polyester fabrics perform well at temperatures between 375°F and 400°F. A common starting point is 385°F, with minor adjustments as needed. Pressing times usually range from 40 to 75 seconds; lighter fabrics like athletic mesh may work best at the lower end of this range, while denser materials might require longer pressing times.
Pressure settings are just as important. Medium pressure, around 40 psi, is generally sufficient to ensure proper ink transfer without damaging the fabric. Before pressing, pre-press the fabric for 5–10 seconds to remove any moisture or wrinkles. Secure the sublimation paper with heat-resistant tape to prevent shifting during the press, as even slight movement can cause ghosting or blurring.
For reference, here are typical settings for sublimation printing on polyester:
Temperature: 375°F to 400°F
Time: 40 to 75 seconds
Pressure: Light to medium (35 to 50 psi)
Keep detailed records of your settings for each fabric type. A reference chart with fabric details, temperature, pressure, and pressing times will be invaluable for scaling production or working with similar materials in the future.
How to Test Sublimation Prints Step by Step
Testing sublimation prints involves specific methods to ensure they meet the demands of real-world use, especially for athletic uniforms.
Check Design and Color Accuracy
Start by inspecting the print under bright, even lighting, using a magnifying glass for precision. Look closely at text, logos, and fine details – like small numbers or intricate team emblems – to ensure edges are sharp and well-defined.
Color accuracy is just as critical. Use a Pantone guide or digital color chart to verify that the colors align perfectly with the required specifications. Pay special attention to gradients and areas where colors overlap, as these can highlight potential printing flaws. If you notice any inconsistencies, document them with photos for future reference. Once the design and colors are confirmed, move on to testing durability through washing.
Test Washing and Wear Resistance
Washing tests help determine how well the prints hold up over time. Machine wash the samples inside-out in cold water on a gentle cycle with a mild detergent. Avoid using fabric softeners or dry-cleaning, as these can compromise the print’s integrity.
After the first wash, inspect the sample for fading, color bleeding, or any signs of deterioration. For a thorough durability check, repeat the washing process multiple times.
To ensure realistic results, avoid washing samples with heavy materials like jeans, which can cause unnecessary friction and don’t reflect typical uniform care. Once washing tests are complete, evaluate the prints under physical stress.
Test How Prints Handle Stretching
Athletic uniforms often face significant stretching during use. Secure the sample in a stretching frame or use clamps, and gradually stretch the fabric in different directions. Extend it to about 150% of its original size to replicate the maximum stretch it might endure during play.
Hold the stretch for 30 seconds, then release it. Inspect the print immediately for any cracking, especially along edges or areas with heavy ink coverage. Test in multiple directions – horizontal, vertical, and diagonal – to ensure consistent quality.
Test Heat and Sun Exposure
Durability also depends on how well the print withstands environmental factors. Expose the samples to direct sunlight or UV lamps for a set period and observe any fading or degradation. Compare these results to control samples kept in cooler, shaded conditions.
High-quality sublimation prints should retain their vibrancy and structural integrity even after extended heat exposure.
Test Sweat and Moisture Resistance
Athletic environments often involve exposure to sweat, humidity, and moisture. To simulate these conditions, mist the samples with a salt-water solution (1 teaspoon of salt per cup of water). Allow them to air dry naturally and then examine for signs of color bleeding, print distortion, or fabric staining.
Since sublimation printing embeds ink directly into the fabric fibers, these issues should be minimal. Properly executed prints should remain intact, with no evidence of ink migration or damage to the fabric.
For consistent quality, keep detailed records of all tests, including conditions, durations, and outcomes. This documentation will help establish reliable standards for your team uniforms.
sbb-itb-4d95ad3
How to Read Test Results and Fix Problems
Interpreting test results effectively requires clear benchmarks and a structured approach to addressing any issues that arise. Setting clear standards is crucial for maintaining consistent quality.
Setting Standards for Pass or Fail
Defining pass/fail criteria involves determining the acceptable range of color variation and quality degradation that still meets your performance needs. These tolerances should balance customer expectations with the realities of production.
In the printing world, color accuracy is often measured using standards like L_a_b, LCh, Delta E CMC, or delta E. A common pass/fail threshold for color accuracy is a delta E CMC of 2.0 or less, though some workflows may allow values up to 5.0. However, setting this threshold too low can make it harder to produce cost-effective, sellable products – particularly in industries like textiles.
Color accuracy is just one piece of the puzzle. It’s also crucial to define realistic quality benchmarks for your overall print output. Consider the lighting conditions relevant to your specific application, whether for sports or other venues. Leverage established industry standards such as ISO, ASTM, SNAP, GRACol, G7, A2LA, and AATCC. Collaborating with your team to understand their satisfaction levels can further refine these benchmarks.
If your results fall short of these standards, it’s time to troubleshoot and resolve common printing issues.
Fixing Common Sublimation Print Problems
Maintaining consistent quality requires quick identification and resolution of printing issues. Sublimation printing problems often have specific, identifiable causes. Some common issues include:
- Yellowing paper
- Fading prints
- Color spots
- Localized fading
These problems may stem from defective coatings, subpar raw materials, or outdated production methods. Among these, color discrepancies are particularly costly. They account for 19.3% of returns in cross-border e-commerce and contribute to $14.7 billion in supply chain expenses, with 21% linked to color stability issues. When problems arise, review your production settings, materials, and processes to pinpoint and resolve the root cause.
When to Run Tests Again
Retesting is essential whenever you introduce new variables into your workflow. This includes switching to a different printer, changing ink suppliers, or using new substrate materials. Even minor changes, such as a new batch of fabric or updated ICC color profiles, should trigger immediate retesting. This is especially important when dealing with team colors that must adhere to strict brand or league guidelines.
For high-value or custom projects, additional test runs can ensure quality and meet client expectations. Always retest after making any adjustments to color, time, temperature, or pressure. Keep detailed records of these changes to build a reliable database of optimal settings for future use.
Adding Print Testing to Your Uniform Ordering Process
Incorporating thorough testing into your uniform ordering process is essential to safeguard your investment and ensure your team receives uniforms that meet performance expectations. The key is to introduce testing at critical stages, allowing you to identify and resolve issues before they escalate into costly problems.
Testing During Sample Review
The sample review stage is your first and most important opportunity to catch potential issues before committing to mass production. Every sublimation sample should go through a complete testing process, including checks for color accuracy, wash durability, and stretch performance.
Pay close attention to how team colors align with official brand standards, especially if you’re working with school or league-specific color schemes. Document any inconsistencies during this phase – take photos of color mismatches, measure changes in dimensions post-wash, and note any fabric performance issues. These records are invaluable for communicating adjustments to your supplier. Reject any sample that doesn’t meet your criteria, and request additional samples if the results are borderline or unclear.
Once the sample review is complete, move forward with final quality checks to confirm that production will adhere to approved standards.
Final Quality Checks Before Mass Production
Building on the findings from the sample review, final quality checks ensure that the production process mirrors the approved specifications. Conduct a last round of verification before mass production begins to confirm that materials and settings match what was tested during the sample phase.
Establish clear communication with your supplier about any changes that may occur during production. Even small adjustments can impact the final outcome, so your supplier should notify you immediately of any deviations from the approved specifications and provide updated test samples if necessary.
Create a detailed production checklist that includes all critical elements – approved color codes, fabric specifications, print resolution, and finishing details. This checklist acts as your quality agreement, outlining the standards for accepting or rejecting the final product.
How Wooter Apparel Ensures High-Quality Sublimation Prints

Wooter Apparel exemplifies how thorough testing can be seamlessly integrated into the production process. Their team of skilled designers works tirelessly to bring any design to life, ensuring every aspect of the uniforms is fully customizable to meet client specifications.
The company exclusively uses full-sublimation printing, widely regarded as the top choice for sportswear due to its ability to maintain vibrant, long-lasting prints. They also prioritize material quality, using advanced fabrics like dry-fit, moisture-wicking, breathable 100% polyester with interlock mesh for durability, and lycra in high-stress areas like the neck and shoulders for added flexibility.
From fabric selection to printing and stitching, Wooter Apparel employs rigorous quality control measures at every stage. Each item undergoes meticulous inspection to ensure it meets high standards of durability, comfort, and performance. This methodical approach ensures that potential issues are addressed early, preventing them from affecting the final uniforms.
Wooter Apparel’s process highlights the importance of integrating testing throughout production rather than treating it as an afterthought. Whether you’re ordering custom basketball jerseys for $16.99 each or complete team uniform packages, applying the same level of scrutiny ensures your team gets the best possible gear.
Conclusion: Getting Quality and Performance in Team Uniforms
Testing sublimation prints is the key to separating long-lasting uniforms from those that fall apart too soon. Sublimation works by creating a molecular bond, which ensures prints stay vibrant and durable – when done under the right conditions.
By using the testing methods outlined earlier, you can identify and address potential problems before they turn into expensive mistakes. These tests confirm that team colors stay vibrant, prints endure multiple washes, and designs hold up against stretching and exposure to moisture.
Keeping a record of the ideal test settings simplifies future orders and guarantees consistent results. This is especially helpful when reordering uniforms or expanding your team’s apparel lineup.
Investing time in thorough testing upfront ensures your team’s uniforms look sharp and perform well all season long. Players can focus on their game with confidence, while decision-makers can feel assured about the quality of their investment.
FAQs
What should I check when testing sublimation prints for team uniforms?
When testing sublimation prints for team uniforms, pay close attention to print alignment problems. Misalignment can lead to blurry or even double images, which will ruin the overall look. Another issue to watch for is color inconsistencies – faded or dull colors often indicate incorrect heat press settings, whether it’s the temperature, time, or pressure.
You might also encounter ghosting, which appears as a shadow-like effect caused by movement during the transfer process. Moisture issues are another culprit, leading to uneven prints, while ink bleeding can affect both the appearance and durability of the uniform. To avoid these problems, double-check your heat press settings and make sure all materials are properly prepared before you begin printing.
How does sublimation printing keep team uniforms vibrant and durable over time?
Sublimation printing keeps team uniforms looking sharp and vibrant by embedding dye directly into the fabric through a combination of heat and pressure. This technique creates a lasting bond, ensuring the colors won’t fade, crack, or peel – even with regular washing or heavy use.
When paired with premium sublimation inks and carefully calibrated heat press settings, the colors remain bold, and the designs retain their crisp details. This makes sublimation printing a top choice for team uniforms, offering durability and a polished, professional look that stands up to season after season of wear.
What should I do if sublimation prints on team uniforms start to fade or show color changes after testing?
If your sublimation prints are fading or showing unexpected color shifts during testing, it’s time to troubleshoot the usual suspects. Start by checking for moisture in the substrate – even a small amount can throw off the results. Also, inspect your printer for clogged nozzles, as these can disrupt the flow of ink and affect the print quality.
Next, take a closer look at your heat press settings. Ensure the temperature, pressure, and time are correctly adjusted for the material you’re working with. Remember, the substrate should have a high polyester content or a coating that’s compatible with sublimation for the best results.
If the problem continues, double-check your printer’s color management settings to make sure they match the design file. Once you’ve made these tweaks, run another test to see if the issue is fixed.